
Custom Activities allow you to build drills and tests that match your exact training goals.
You can choose how the pods are activated, arrange the sequence, add visual or cognitive cues, set the number of repetitions, and select the athletes who will participate.
Once created, your activity can be saved and reused in future sessions.
1. Start a New ActivityFrom the Sportreact app homepage, tap Create Activity.
Choose the training mode you want to use.
Depending on your setup, this may include:
- Timing Gates
- Reaction Lights
- Reactive Agility
- Cognitive Training
- Combined timing and reaction activities (available with PLUS only)
The available settings will change depending on the selected mode.
2. Set Up the Activity Sequence
Open the activity setup area and add the steps you want athletes to complete.
Each step represents an action performed by one or more Sportreact pods.
Depending on the selected mode, you may be able to:
- Start or stop the timer
- Activate a specific pod
- Display a visual cue
- Wait for a pod to be hit
- Trigger a pod when an athlete passes through a timing gate
- Add a delay
- Randomize the next pod
- Create multiple activity rounds
Arrange the steps in the order in which they should happen.
Use drag and drop to move steps and adjust the sequence.
3. Choose How Each Pod Is ActivatedSelect the activation method for each step.
Sportreact activities can use different triggers depending on the drill and hardware setup.
Examples include:
- Laser trigger: Activates when an athlete passes through a timing gate
- Hit trigger: Activates when the athlete touches or hits the pod
- Proximity trigger: Activates when the athlete moves close to the pod
- Automatic trigger: Activates after a selected amount of time
- Visual response: The athlete reacts to the cue displayed on the pod
Choose the trigger that best matches the movement you want to test or train.
4. Add Visual or Cognitive CuesFor reaction and cognitive activities, choose what should appear on the pods.
Available cues may include:
- Colors
- Arrows
- Numbers
- Letters
- Symbols
- Math tasks
- Memory sequences
- Stroop-style cues
For example, you can instruct athletes to:
- Move left when they see a red arrow
- Move right when they see a green number
- Touch the pod showing the correct math answer
- Remember and repeat a sequence of symbols
- Follow an arrow displayed after passing through a timing gate
Keep the athlete instructions clear so they know how to respond to each cue.
5. Adjust the General SettingsDepending on the selected mode, you may be able to configure:
- Number of repetitions
- Rest time
- Activity duration
- Start method
- Random or fixed pod order
- Sound
- Screen brightness
- Hands-Free Start (available only with gates and PLUS)
- Repeat Queue
Review the settings before starting the session to make sure they match your intended drill.
6. Add Athletes to the Queue
Open Choose Athletes to Start and tap Add to Queue.
Select the athletes who will complete the activity and tap Add.
Results will be saved according to the athletes’ positions in the queue.
You can drag and drop athlete names to change their order.
Use Guest Athletes when you want to run the activity without saving the results to individual athlete profiles.
7. Check the Pod SetupPlace the pods in the positions required for the activity.
Make sure:
- All pods are turned on
- The pods are connected to the app
- The correct pod is assigned to each activity step
- Timing gate lasers are aligned
- The activity area is safe and clear
- Athletes understand the drill instructions
Use the activity preview or setup screen to confirm that every pod is in the correct position.
8. Test the ActivityRun one test repetition before beginning the full session.
Check that:
- The correct pods activate
- The cues appear in the correct order
- Every trigger responds as expected
- The timer starts and stops correctly
- Results are recorded under the correct athlete
- Athletes have enough time to understand and respond to each cue
Return to the activity settings if anything needs to be adjusted.
9. Save the ActivityOnce the activity is ready, tap Save.
The activity will appear under your Saved Activities, allowing you to open and run it again without rebuilding it.
Use a specific name to make it easier to identify later.
For example:
- Soccer Reactive Cut – 4 Pods
- 5-10-5 Timing Test
- Tennis Forehand and Backhand Reaction
- Memory Drill – Intermediate
- Rehab Single-Leg Balance
To change an activity you previously created:
- Open My Activities.
- Select the activity.
- Open the activity settings.
- Change the sequence, cues, triggers, repetitions, or other settings.
- Save the updated version.
Consider saving a copy when you want to create a variation without changing the original activity.
Tips for Creating Better Activities:
Start with a simple sequence and test it before adding more steps.
Use fixed cues when athletes are learning the drill, then introduce random cues to increase the difficulty.
Keep pod placement and athlete instructions consistent when comparing results over time.
Create separate versions for beginner, intermediate, and advanced athletes.
Use clear activity names that include the movement, sport, or number of pods.
Always run a test repetition before starting a larger group session.
How do I organize activities with folders?
1. Under activities, choose Folders at the top and Create folder in the middle of the page. Here you can add a folder name and a folder description.
2. Once done, click on select activities and choose which activities you would like to add to that folder.
3. Click on add at the top right once you have made your selection.
4. Once you are back to the folder creation page, click on save at the top right to save your folder.Folders can be edited by choosing the folder and clicking Edit in the top right.
How do I organize activities with tags?
Add tags to your workout sessions as you create them. These tags can then later be added to the activity report filters to help filter out sessions based on tags alone.
How do I share activities?
To share a custom activity with another user, click on the share icon inside the activity:
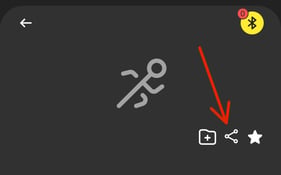
You can search another user by 3 methods:
Teams: Share the activity with another team by selecting the team from your list of available teams.
Users: Share the activity with a team member by selecting them from your list of users.
Email — Sportreact PLUS only: Share the activity with any registered Sportreact app user. Enter their email address and click Search. Once you find the correct user, select their profile and click Share.