Here’s a step-by-step guide to get you started:
1) Go to Athlete Profiling
Navigate to Home screen > Analytics > Athlete Profiling section in the app.
2) Select the Athlete
When Athlete Profiling page opens up, click on Add athlete button. If you've already selected an athlete, press Edit button to change them.
- A list of all your available athletes (organized by team) will appear.
- You can browse the list or use the search bar to quickly find the athlete you want to analyze.
- Tap the athlete’s name to select them for the report.
When you select an athlete, their basic info like Weight, Height, Age, Intensity and Sport will appear in the header. If you previously didn't enter any data about your athelete, instead N/A will be written in the header.
3) Select Team for comparison
Next, press Edit button to select the Team with whom you want to compare your athlete.
- A list of all your available teams (organized by team) will appear.
Tap the “+” button to start a new analysis.
- A list of all your available teams will appear.
- You can browse the list or use the search bar to quickly find the athlete you want to analyze.
- Tap the team’s name to select them for the report.
4) Choose time period
 When analyzing performance data, you can choose the time range you want to include in the analysis. This will incorporate all stored repetitions during the selected period, unless you specifically select a single session tag. You can choose from the following preset time ranges: 1 week, 4 weeks, 1 year, Month, Year, or All (including all stored repetitions).
If you want to select a specific time period:
a) Click the Custom button (last in line).
b) Use the calendar to choose your start and end dates.
c) Confirm your selection to apply the custom date range to the analysis.
5) Select activities
To select activities for the profiling, press Add activity.

Add activity screen will open.
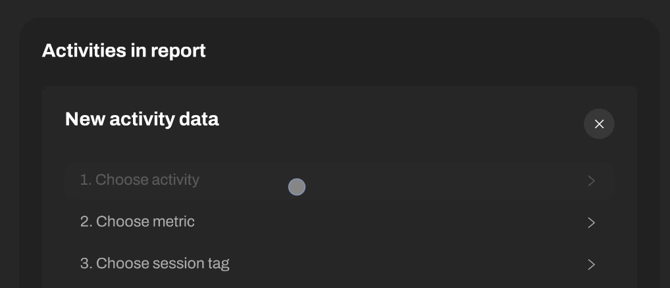
Here you can choose:
Activity
Select any exercise, drill, or testing session you’ve saved.
Metric
For timing gates: total time, velocity, power, force, acceleration
For reaction lights: total time, fastest time, slowest time, average reaction time
Session tag
If you’ve added tags to your sessions or reps, you can filter your analysis to include only those
When you're finished with the selection, press Add.
All the analysis data will show. If you want to compare only one exercise, feel free to do so.
6) How to select another activity?
If you'd like to compare athlete across multiple activities, scroll down to the end of the screen, and repeat steps from section 5 (press the button Add activity > Choose activity > Choose metric > Choose session tags > Add). You can choose multiple activities in total.